Collab.Land Bot on Telegram
This article walks you through the steps to create a token permissioned group with Collab.Land.
Before we begin, you will need a Telegram group. If you do not have one, create one now.
Step 1 - Edit Your Group Settings
Access your group settings by selecting your group icon in the upper left hand corner of the menu bar, or by selecting the 3 dots and then clicking Info.

Click Edit to edit the group settings

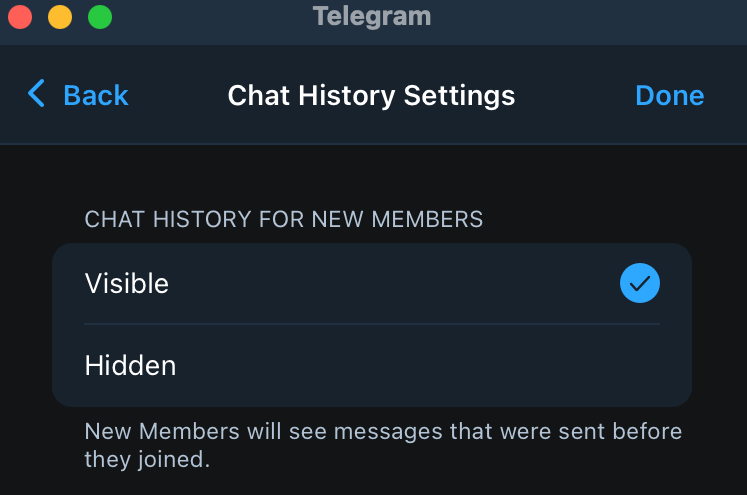
Click on Chat History for New Members and select Visible, click Done to save your changes. This allows new members who join to view the full message history and will upgrade your group into a supergroup.
If you don’t enable the chat history before inviting the bot, it will not show in the Dashboard. Please remove the bot, make the Chat History for New Members -> Visible, and add the bot again.
Step 2 - Adding the Collab.Land Bot
From the group info screen, select +Add
In the search bar that opens, type “collablandbot”.
Please enter the username exactly - beware of imposters with similar namesSelect the bot, and click OK to add it to the group.

Step 3 - Adding Admin Permissions
For Collab.Land to work as expected, it requires admin permissions
From the group info screen, click Edit on the top right corner and then click on Administrators

Click on Add Admin and select the Collab.Land bot.
The bot should have the following permissions enabled, Ban Users, and Invite Users via Link.
Once finished click Done.

Step 4 - Configuring Token Granted Access
All configuration and management of Collab.Land is done in the Command Center. You can edit the Token Granted Access for your group by going directly to Command Center or sending a direct message to @collablandbot with the /start command and following the Group Admin (Command Center) Link.
Once in the Command Center, select your Telegram group from the list on the left.
The Command Center has two main features
Bot Config

This is where you will find the group invite link.
You can also enable, disable or edit the community welcome message. When the “Show community welcome message” is toggled on, a welcome message will be sent to all new group members.
TGA - (Token Granted Access)
The TGAs tab is used to manage TGAs for a community. Admins are able to:
Create new TGAs for their community roles
Configure existing TGAs
Delete existing TGAs
Filter through existing TGAs, so admins can locate specific ones easier
In order to Create or Configure a TGA, the following information is needed:
Description: Optional description of your TGA, this is only displayed in the Command Center for your reference.
Chain type: The chain the token for this TGA is on.
Token type: The type of token used for the TGA.
Note: When using ERC1155 token type, you must enter the token IDs for all tokens in your collection in the token ID section. Separate token IDs by one comma, and no space.
Address: Contract address of your token
Balance: Minimum and Maximum (optional) amount of tokens that are required to get the role.
Attributes (optional): For NFT token types such as ERC721, you can add specific metadata conditions which must be met for the member to get the role. If your NFT contains metadata traits and values, you can enter them by clicking on the Attributes button, and clicking on + Add metadata. Once you have finished adding your metadata, click the Add Traits button
Note: You can find the metadata traits and attributes for your token by looking at the properties tab of the token on OpenSea.
HELPFUL TIP: See here for configuring TGRs on Discord - the process is similar.
ERC1155: https://www.youtube.com/watch?v=NngqwW0lQNQ&list=PLQbEq7a9kYPnufJFY8XDr5HjvPaThjoS-&index=4
ERC721 Metadata:
https://www.youtube.com/watch?v=pYhBPm7ixak&list=PLQbEq7a9kYPnufJFY8XDr5HjvPaThjoS-&index=3
Step 5 - Save
Once you have added all of your token details, click the Save button and your TGA has been created!